Introduction
The background in photography is a space between the object and the viewer. It can emphasize the meaning, add the atmosphere or, conversely, distract, complicate, violate the composition. Often, it is on how competently the background is processed that the integrity of the frame and the emotional perception of the picture are dependent. The perfect background is not striking - it works unnoticed, but confidently.
On the blog Gimp Tools Hub We consider editing not as a correction tool, but as a continuation of the author’s intonation. Today we will tell you how in GIMP you can clean the background of visual noise without destroying its naturalness, volume and light. After all, the background is not a void, but a context fountain.
Why work with the background
Even a well -shot scene may look overloaded if they remain behind the main object:
- bright distracting spots;
- extraneous objects;
- visually heavy shadows or light reflexes;
- Negarmonic color elements.
Working with the background allows:
- strengthen the emphasis on the main;
- streamline visual perception;
- create rhythm and depth;
- Make the composition completed.
However, it is important to maintain a sense of reality - not to turn the background into an artificial plane, but to lead it to visual equilibrium.
Stages of working with the background in GIMP
1. Analysis and selection of approach
Before starting editing, you should ask yourself a few questions:
- What distracts from the main one?
- Which part of the background strengthens the plot, and which interferes?
- Should the background be noticeable or dissolve?
Sometimes a fairly easy displacement of accents, sometimes a subtle restructuring of the structure of light and color.
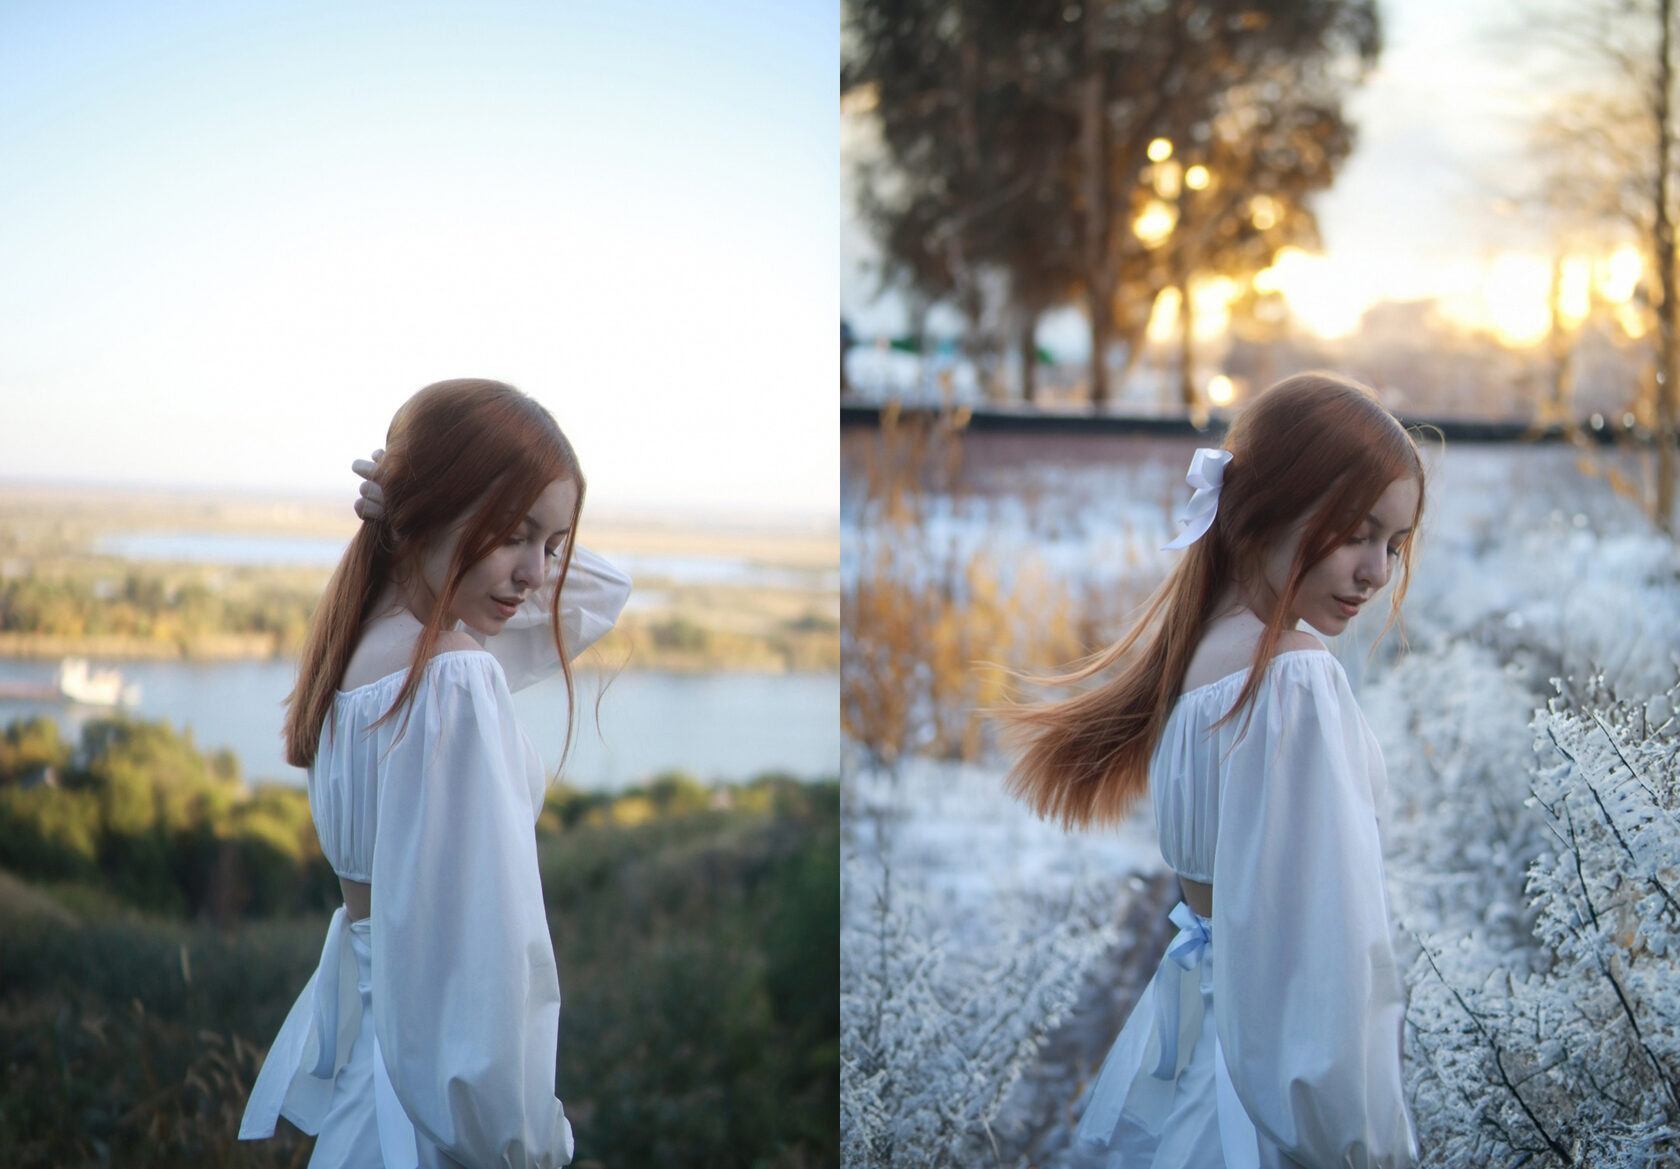
2. Litting the background through blur
One of the most aesthetic ways to give the background softness is to use the blur effect. This is especially true for street or interior filming, where the background is often overloaded with details.
Recommendations:
- Select the main object using the Paths or Quick Mask tool;
- Create a copy of the layer with an object;
- Apply the filter Gaussian Blur to the lower layer;
- adjust the degree of blur to maintain a natural depth.
Additionally, you can use the mask so that the border between the object and the background remains soft and invisible.
3. Correction of color and brightness
Often the background is distracted not because of the forms, but because of the color. Excessively saturated shades, a sharp contrast or inharmonious light can pull attention.
What can be done:
- lower the saturation of the background with Hue-Saturation ;
- adjust the balance of white for greater neutrality;
- use Curves or Levels to control tonal transitions;
- Create a corrective layer with a soft gradient, balancing light.
The goal is to bring the background closer to the tonality of the main object or, conversely, create a contrast that emphasizes shape.
4. Work with details: local interventions
Small elements that are knocked out of the visual flow can be neutralized using spot tools. But it is important not to erase the texture and not destroy the feeling of space.
Useful tools:
- Heal Tool - ideal for fusion of textures;
- Clone Tool - used to fill uniform areas;
- Working with masks - allows you to apply editing only to a specific zone.
Work on a separate layer. This will maintain control over the result and will allow you to adjust the effect at any time.
5. Adding depth through light and shadow
Soft modeling of light on the background helps to enhance the three -dimensionality of the image. They work especially well:
- light dimming of the edges of the frame;
- imitation of soft reference light;
- Creating local spots of light emphasizing the shape of an object.
In GIMP, such effects are achieved using radial gradients, correcting layers and application regimen Soft Light . The effect is alive and does not require radical interventions.
Aesthetics of background space
A good background does not have to be clean. Sometimes his "imperfection" is part of the atmosphere. It is only important that this "imperfection" works for the idea.
Adviсe:
- Leave the texture: a brick wall, a haze, a defocated forest is not a noise, but a context.
- Avoid sterility - it kills liveliness.
- Work through emphasizing, not suppression.
- Divide the style of the object and background, but find harmony between them.
Conclusion
The background in photography is not only the background, but also the visual space in which history unfolds. A well -developed background makes the image cleaner, deeper and more expressive. He does not tighten attention, but helps to place accents.
In GIMP you can achieve this delicately and accurately, without destroying the structure of the picture. On the blog Gimp Tools Hub We believe: editing is the art of balancing. The ideal background is not the one that is not visible, but the one that invisibly supports everything else.

Gracie-Mae Beattie
Your post opened up a new perspective on this issue. Could you go into more detail in the following articles?